Friday, September 21, 2012

Surfs Up Dude


This was Harrison's first trip to the beach!  Lots and lots of fun that day!  If we would have let him he would have walked into the ocean until he drowned.  He LOVED it.  While we were in Florida that year for my sister's wedding we visited some friends who live in the Cocoa Beach area.  They have a little boy (who is pictured in the middle of the layout in the red hat) who is one year older than Harrison.  We all had a great time enjoying the sun and the sand.  I lost my glasses that day in the waves and had to go get another pair that afternoon.  Fun Times!  The large letters in the title are from a pack I bought at Tuesday Morning a couple of weeks ago.  They are so cute with all kinds of different prints and stitching.  I bought two packs.  I think they were 1.99 a box.  A great find!  Hope you all have a great weekend and remember, it is always homemade!

Wednesday, September 19, 2012

Quick Flat Note Cards


This is a quick set of flat note cards that I made one day after purchasing a set of 10 or 12 border stamps at Hobby Lobby while they were on sale.  I see many uses for them in the near future!  Last week, you saw the ABC border on the tag that accompanied the pencil crafts that I made for my son's pre-school teachers.  These borders are great for quick cards, quick embellishments on scrapbook pages and also for small tags.  I am sure there will be many more uses for them in the future!  Hope you enjoy and remember, it is always homemade!

Monday, September 17, 2012

Circles...


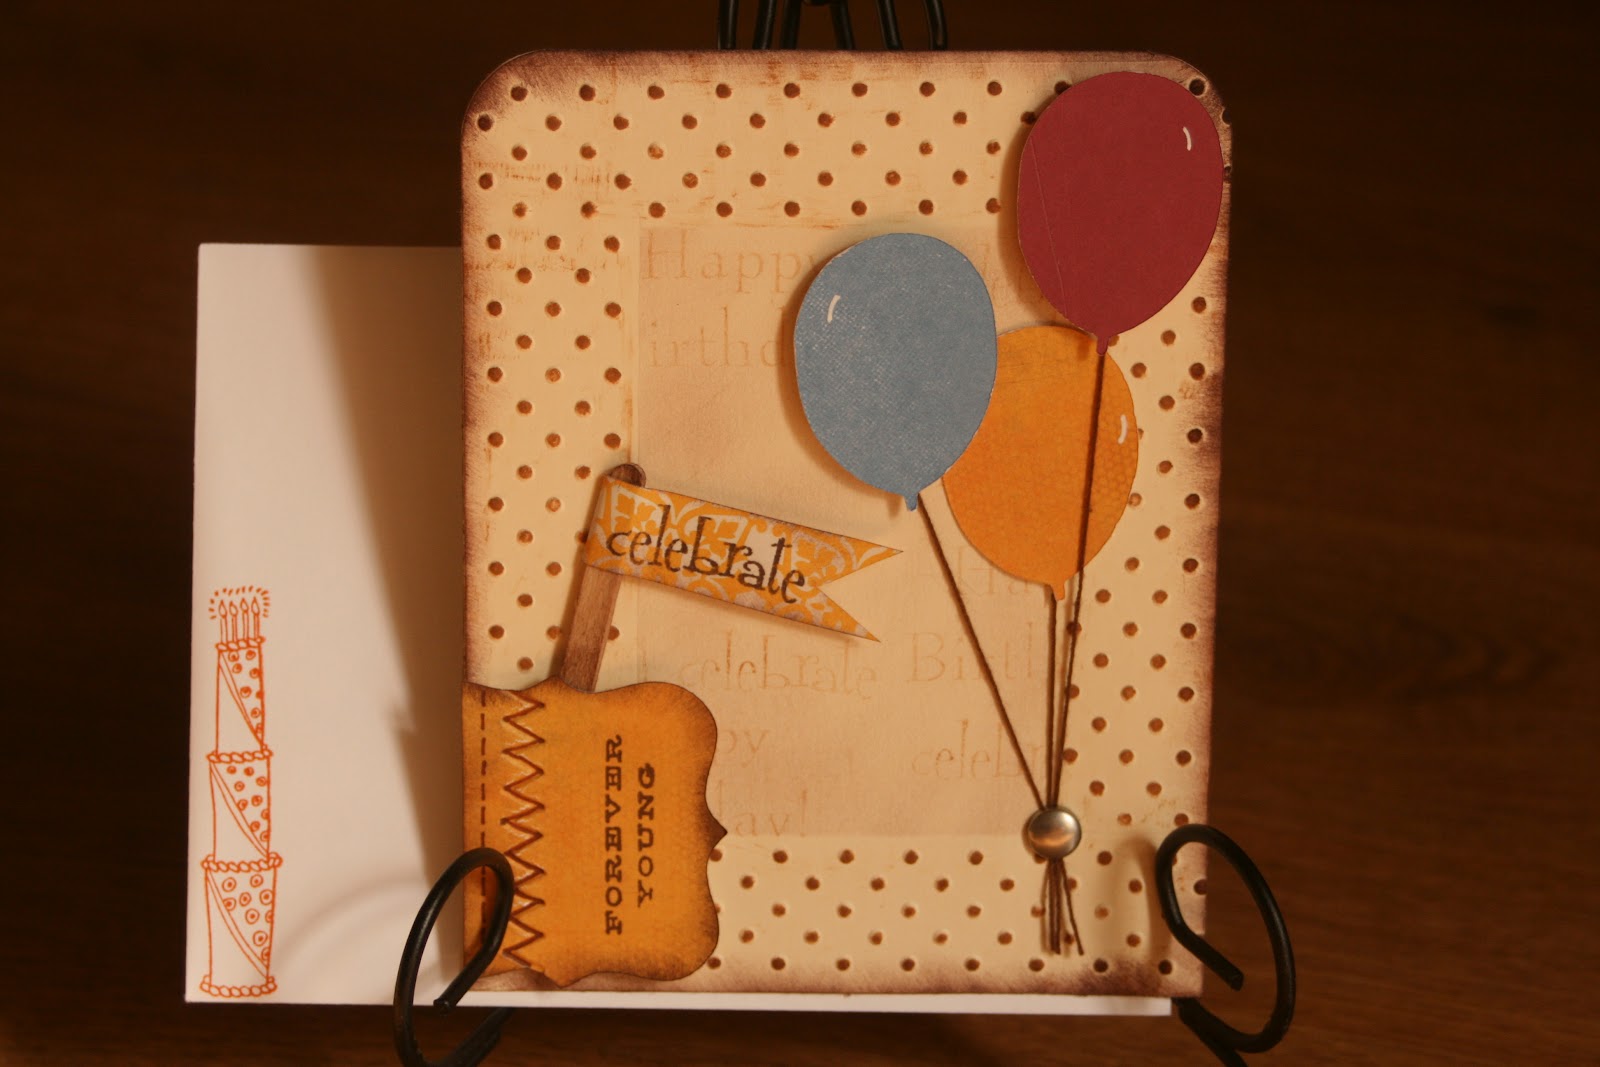
So, this week, here is the card that I made using this mini card as the sketch.  I hope you all have been enjoying this series because I sure have.  It is really fun trying to re-create these little cards.  This one is basically the same just using different colors.  The folder look on my card is made using a rectangular shape and adding a label punch to add the flap.  I used my embossing machine to make the zig zag sewing effect.  The faux stitching on the middle circle is a rub-on.  I inked it up and called it done.  Just another way to take a sketch and make it into an actual card.  Have a great day and remember it is always homemade.
 

Friday, September 14, 2012

My Sister's Wedding


My little sister got married in August of 2009.  She married the man of her dreams and was beautiful as she walked down the isle.  Here are a few snapshots of the lovely couple, the family and a few memorable moments.  When I purchased the Paper Doll Dress Up Cricut Cartridge a few years ago, one of the first things I made was this little bride.  I had my sister in mind and made the bouquet red because that is what her colors for her wedding were going to be.  Anyway, this little bride has been waiting on my bulletin board for two years or so to be used on this layout....how crazy is that? So, this is the layout I made to remember the day my sister was married.  Hope you enjoy and remember, it is always homemade!

Thursday, September 13, 2012

Small Goal.....


Well, I am about to achieve one small goal. I am about to be done scrapbooking the year of 2009. I have 300 pics coming to me that are from the year of 2010 sometime in the next few days. Then I will get busy scraping 2010. Wow! Now I am just shy of being three years behind! Ha! If I keep up this rate of producing pages, I could be caught up soon! Hopefully I could do that. Mind you, I would have to REALLY work on my travel album and my daughter's first year album as well. But, if I could only get our family album up to date, that would be a feat all in itself.

I don't know if anyone else has a problem with this, but I hate scrapping Christmas photos.  I really hate to say that but I just feel like all the pics I take around that time of the year are random shots....there is no consistency.  Does that make sense?  I feel like the photos are all over the place and just confusing.  I feel like my pages never flow right!  Anyway, I am about to take that task on and I have to do three Christmas layouts, so here goes....  I think this year when the family all gets together, I will make each family take pics together so that maybe when I scrap these pics there will be some order to them.  We shall see!  ;). I hope I am not the only one who dreads doing these pages that are such a happy time of year.  I really love the holidays but when it comes to scrapping them, I dread it!  Help me get out of this funk!  If you have any ideas on how to help me, please leave a comment below.

Have a great day!  I hope you are getting some scrapping done!  Smile and remember, it is always homemade!

Wednesday, September 12, 2012

Candy Pencils


Pinterest.  Again!  How cute are these???  Inside the paper is a roll of ROLOs candy and then on top is a Hershey Kiss.  I attached the tag underneath the Hershey Kiss so that it would stay put and not move.  I hear the teachers loved them.  I have been wanting to make these for a while but couldn't because it was the summer...not anymore!  :-) 

Directions:  (Video Below)
1.  Cut yellow cardstock to about 3 3/4 inch x 4 1/4 inch.  Then run the longer side into a paper crimper.
2.  Cut a pink piece of cardstock about 3 1/2 inch x 2.  Ink the edges and attach the long end to the end of the yellow paper with red tape. (You will have to overlap the paper, depending on length of the ROLOs.  Just measure it before you attach the two pieces together.)
3.  Place some glue on the inside of the paper as well as red tape on one of the long ends of the prepared paper piece.  The red tape will be at the closer of the roll after you wrap it around the candy.
4.  When the ROLO candy is covered, add glue dots, tag string and the kiss to the top to appear as the "lead" of the pencil.

I hope all these directions make sense....it is making me think I should do a video for this project....

And....so, I did!  It is below.  It is really quick, just shows you how instead of telling you how....Hope it helps.  Have a great day and remember it is always homemade!


Monday, September 10, 2012

Inspiration Card #2 of 4


The "sketch"
 
Where as last week's card was a little different from the sketch, this one is nearly identical.  This is probably one of my most favorite cards that I have ever made.  The colors are just perfect together and it just flows so well.  I used a demask stamp (lightly stamped) on the red hear to give it the effect of the sketch.  It just really turned out cute!  Have a great day and remember it is always homemade! 

Saturday, September 8, 2012

Louisville Zoo


As promised, here is an extra scrapbook layout for the week.  I know I keep repeating myself the last few weeks but simple is best and the fastest way to get a lot of layouts done!  Place the pics and then embellish the journaling area.  That is my new motto!  I have not done as many layouts this week, as we have been extra busy with pre-school starting for my little boy, but I have still done several.  I hope to keep up this pace.  Snapfish is running a sale right now 100 prints for 99 cents.  Now, you still have to pay shipping, but this is still an AWESOME deal.  They have this sale a few times a year and each time I print hundreds of photos.  I am about to print all the way through 2010!  So, many layouts to come!  I have set a goal for myself next year (already) and I will let you know soon what that is going to be!  It has to do with scrapbooking layouts.  I am going to get caught up more next year than I am doing this year.  Anyway...hope you enjoy the extra layout and remember, it is always homemade!

Thursday, September 6, 2012

Kentucky Derby Museum


This is another layout from our trip to Louisville with my husband in 2009.  This layout shows some of the pics we took while visiting the Kentucky Derby Museum.  We made this little tour on our way out of town.  It was overcast and looking like rain but we made it through the tour without getting wet...which was nice!  Again, I arranged the pictures and then embellished (for the most part) the journaling area.  I hope you all have a great weekend ahead and remember, it is always homemade!

Wednesday, September 5, 2012

Card Set and Box


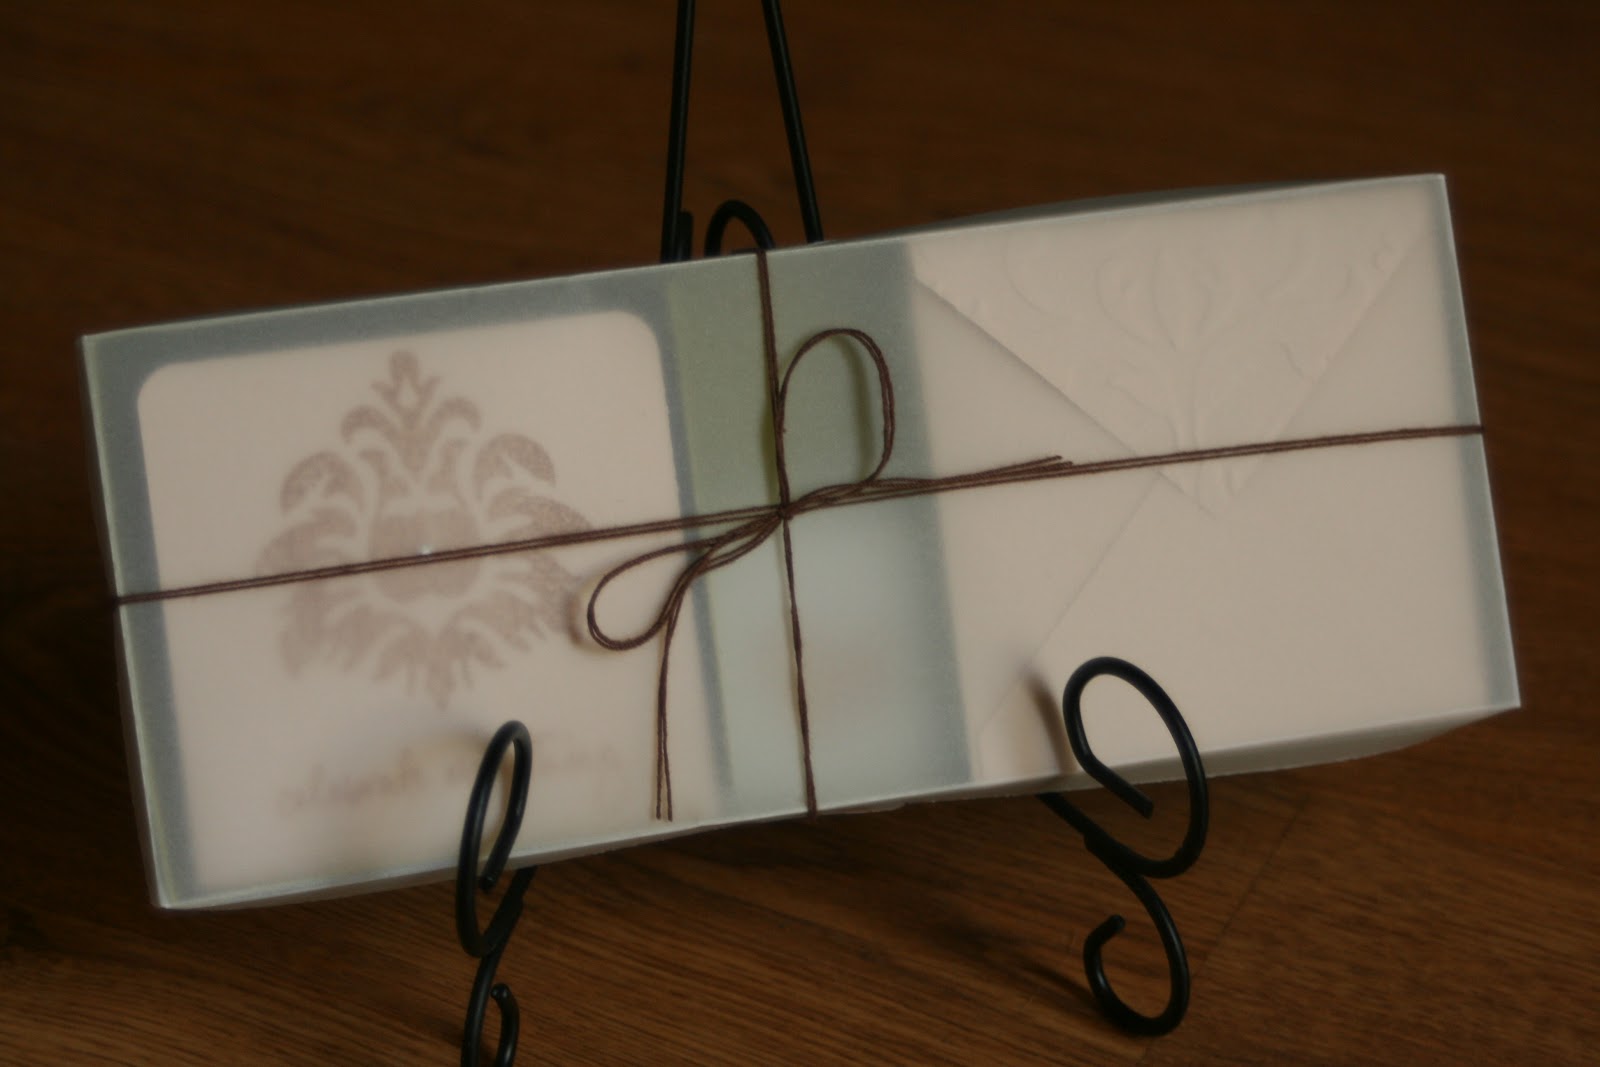
This is basically only a 3x3 card set with embossed envelopes....but, how cute are they in this little box?  The cards are stamped with a demask stamp, "celebrate everything" stamp and then I used my score board to make the three embossed lines above and below the sentiment.  I also added a little gem in the middle of the demask stamped image.  Cute, easy, and classy!  I then made some vellum stickers to place on the back of each envelope.  The instructions for the box are HERE.  The only difference is that I used vellum instead of Stampin' UP! window paper (I think that is what it is called).  Anyway....hope you enjoy making this little card set and box for someone!  Remember, it is always homemade!

Monday, September 3, 2012

Inspiration Card #1 of 4


To start off this little series on my blog, you get two card ideas and two videos!  No, I am not kidding!  Kristina Werner did a short series on how she finds inspiration all around her from her surroundings and all different types of scrapbooking items.  One of her quick tips during this series was looking at small printed tags and using those as a "sketch" of sorts.  So, this month, we are going to focus on that aspect.  I bought several 12x12 pieces of paper that had 12-16 tags printed on them (you can see these in the first video below).  I have taken that tag this week and made two cards.  The first is actually using the tag on a card and the second one is using the tag itself as the sketch.  Below are the videos of my making both cards and showing you how this works.  I hope you enjoy this series and I hope it gets your juices flowing.  I have had a lot of fun making these series of cards.  Hope you enjoy and remember it is always homemade!
 
Video 1
 
 
Video 2


Saturday, September 1, 2012

Update....


Believe it or not I have done 15 scrapbook pages this week alone! I really think that is a record for me. I have just "been in the mood". Maybe realizing that I was 3 years behind finally gave me a little kick in the behind! I have been busy this week too, so I really do not know how I accomplished that feat. So, next week you may get an extra scrapbook layout or two to keep you excited about getting to your scrapbook area and to working on something! Today begins a three day weekend for most so if you get a chance, try to do one layout a day this weekend. Try to sneak off to your desk and get something done. One difference in my work area and work strategy this week is this.....I have literally been working on my ironing board instead of my desk. I have a scrapbooking "station" in our room. Well, one day, when I get a room to myself ;), I really plan to have a table so that I can put together projects while standing up. I am up and down out of my chair so much when I work that standing up at a counter top of some kind would really help me when it comes too putting stuff together. We have one of those ironing boards that hang on the closet door and then folds out when you need it so, what I have been doing is before I even get ready to scrap, I have been collecting all the items from my desk and drawers that I think I might use and laying those on my bed which is near my ironing board and then I get to work on the ironing board where I can stand up. No, it isn't the most flat or hard surface, but it is working right now. It also makes me clean up everything each day as well....because, unlike my desk, I have to clean it up to sleep or get into my closet. If I need to stamp or do anything else on the layout that needs a flat surface, I do that last and take my project to my table and finish it up. One other thing that I have been doing as well is placing the pictures, mat them or not, and then basically just embellishing the journal area (as you have seen in my last two pages). It works out great for me because it is simple to lay out the pictures and then all I have to "decorate" is the journalist area. I have really liked my pages that I have done this week with that strategy. I scrapbook different that most...my layouts do not have tons of embellishments. I like the way others embellish, I just can't waist that much time on one page. I would be 10 years behind if I didn't put millions of pictures (like I do) on one page. I pack them on there. Also, I have cut down on the amount of pictures I try to put on my pages (believe it or not) because many of my one page layouts really would have been two if I had not thrown away several pictures. I feel like I am waisting money by throwing them away, but I am saving by only doing one page instead of two right? Also, time is money, right? Anyway....next week starts my first series on my blog. It will begin Monday and will run each Monday through the month of September. It will be taking the mini cards that you can purchase on a 12x12 sheet and using them as "sketches" for a card. It has been really fun creating these cards and I hope you enjoy the series. I plan to have a different series each month for the rest of the year. Lots of fun things coming up! Monday begins the week with TWO videos on how-to work this series into your card making with two ideas on how to use these mini cards when you make cards. I hope you all have a great holiday weekend and lots of time to sit back, relax and craft (of course)! Have a wonderful day and remember, it is always homemade. (Sorry this all ran together....it really was divided into paragraphs but I made this post using my iPad and it doesn't work as well as my laptop.)

Friday, August 31, 2012

Louisville Slugger


This is the layout for the week.  Our family (before I had our daughter) at the Louisville Slugger Museum.  My husband does contract work for a company based in Louisville and goes up there occasionally for business.  So, in 2009, we went along with him (just as we did this past July) and while he worked during the day, Harrison and I played!  One evening we went to tour the Louisville Slugger Museum.  We had a blast....I don't know who had more fun, our son or my husband, but it was a great evening out together.  We purchased a personalized baseball bat for our son and made many memories together that week.  Hope you enjoy the layout!  It was fun reminiscing!  Have a great day and remember, it is always homemade!

Wednesday, August 29, 2012

Card/Tag


This is a cute Card/Tag to send to a married couple or to your hubby one day in his lunch or in his luggage when he is going out of town.  It is a simple tag that is decorated with a place on the back for a quick message.  The playing cards are from the Dollar Tree.  They are mini cards.  Very cute and perfect for the use on small card fronts or scrapbook pages.  You never know what you will find at the Dollar Tree or a Thrift Store.  Check it one out one day soon going in with just a "creative" mind.  You will find more than you think!  Have a great day of crafting and remember, it is always homemade!

Monday, August 27, 2012

Quick and Easy Make-n-Take


First of all, I know this picture is not the best, but I wanted to show you all of the circles that I stamped.  While in Florida, I had to take some kind of crafting project to work on....I had gotten several stamp sets out that I had not really used much yet and I wanted to play with them a little bit.  So, I punched out many circles and then I stamped them all with all different kinds of stamps.  When I got home, I used my scalloped circle punch and punched out printed paper to match each stamp.  The following pictures are some quick projects and cards that you can make with these on the go....
Have a great day and remember it is always homemade.


Saturday, August 25, 2012

Oatmeal Waffles


This is what was for breakfast at our house this morning. Thought I would quickly share the recipe. These waffles are filled with all things good for you....and your kids will never know it, as long as there is some syrup on top! I have no idea where I found this recipe but it was on the Internet somewhere. Hope you enjoy!

Oatmeal Waffles
2 eggs
2 cups buttermilk (Can substitute regular or almond)
1 cup quick oats
1 tbsp molasses
1 tbsp oil 1 cup wheat flour
1/2 tsp salt
1 tsp baking powder
1 tsp baking soda
Squirt of vanilla
Ground Flax Seed (optional)
1. Mix the eggs and milk together.
2. Add the oats and mix.
3. Add molasses and oil and mix.
4. Mix flour, salt, baking powder and baking soda in a separate bowl. Then add to wet mixture and mix well. (I always add ground flax seed to this mixture as well for a little added umph of goodness) 5. Add to a waffle maker and eat, eat, eat!

Very good. Very good for you. Secret healthiness. Remember, it is always homemade!

Friday, August 24, 2012

Boy Meets World


Okay, so since my desk was a mess (and I really have no idea how it got that way), I worked on my bedroom floor making this layout.  Even so, I think it turned out really cute.  I always so such simple layouts so, I decided to get some of the new things I have bought recently and some things that I haven't used much and I got to work on making a really cute page.  These were some snapshots that I took of our son in July of 2009.  Yes, that is how far behind I am still!  I just wanted to do a quick layout that focused on several snapshots all at once.  The elements on the bottom of the page  are from all kinds of little packs of embellishments that are laying around in my scrap area!  The letters are epoxy letters, the red bicycle card is from a 12x12 piece made by Crate Paper (The Toy Box Collection).  Something I picked up at Archiver's.  The blue piece underneath is a paint chip named "Little Boy Blue"....how appropriate!  The other little pieces scattered around are from a couple of different little embellishment sets that have been sitting in my drawers for too long. 
 
Hope you enjoy and have a great day of scrapping!  Remember, it is always homemade!


Wednesday, August 22, 2012

Origami Boxes


How cute are these little boxes?  Perfect for little treats for anyone...and they can be decorated however you choose.  I saw this box on a you tube video done by Kristina Werner.  The video is below and she also shows a great way to decorate these little boxes.  She used a paper bag to make hers and that is how my box on the right is made.  I love the vintage vibe it gives.  My other box is made a little larger with thin printed paper.  If you need a more sturdy box, this is the way to go....and it is pre-decorated for you.  All it needs is a bow to finish it off.  Both are very cute.  You can make one in about 5 minutes after you make your first.  Hope you all have fun making these for little treats or baked goods to give to family and friends! 


Have fun and remember the best gift is always homemade!

Monday, August 20, 2012

Peek-a-boo Card....Soooooo Cute!


This is a really cute card.  I will say that it isn't the easiest card to make but after you make it once it is easier the second time.  FYI before you start--DO NOT TRY TO CHANGE THE SIZE OF THE CIRCLE PUNCH...just sayin'!  It will not work....the smaller circle works perfectly.  The front of my card looks a little different than the one in the video below but that's what's great about any card....you decorate it to your own taste and to your own genre of card.  I made mine into a "True Love" card.  I always need cards to send with my husband when he goes out of town so, just a warning, I have made several lately!  You will probably see them soon!  :-) 

Anyway, below is the video from which I got the directions to make this card.  Dawn is a Stampin' UP! demonstrator and she has a great blog and many videos on YouTube.  Her YouTube channel is "dawn5377" and her blog is www.dawnsstampingthoughts.net  

Enjoy the video and making one of these really cute cards!  Remember, everything is always homemade!

Friday, August 17, 2012

Scrapbook Layouts


I will admit, I have cheated a little this week. I have not done a new layout and here is the reason....I am potty training my little girl and simply have not had the time. I do the Three Day Method and you have to be by her side for three days. It is a long and exhausting three days but totally worth the end result. Yesterday was day one and she did great! By the end of the day, she was not having any major accidents. She was telling me when she needed to go...so, hopefully today will be a little less stressful and tomorrow will be a breeze.....HOPEFULLY! It worked like a charm with my son two years ago and so far it is going well with her. If you have a toddler, I highly recommend this technique!! Okay, that was my little plug in for potty training now on to the layouts!

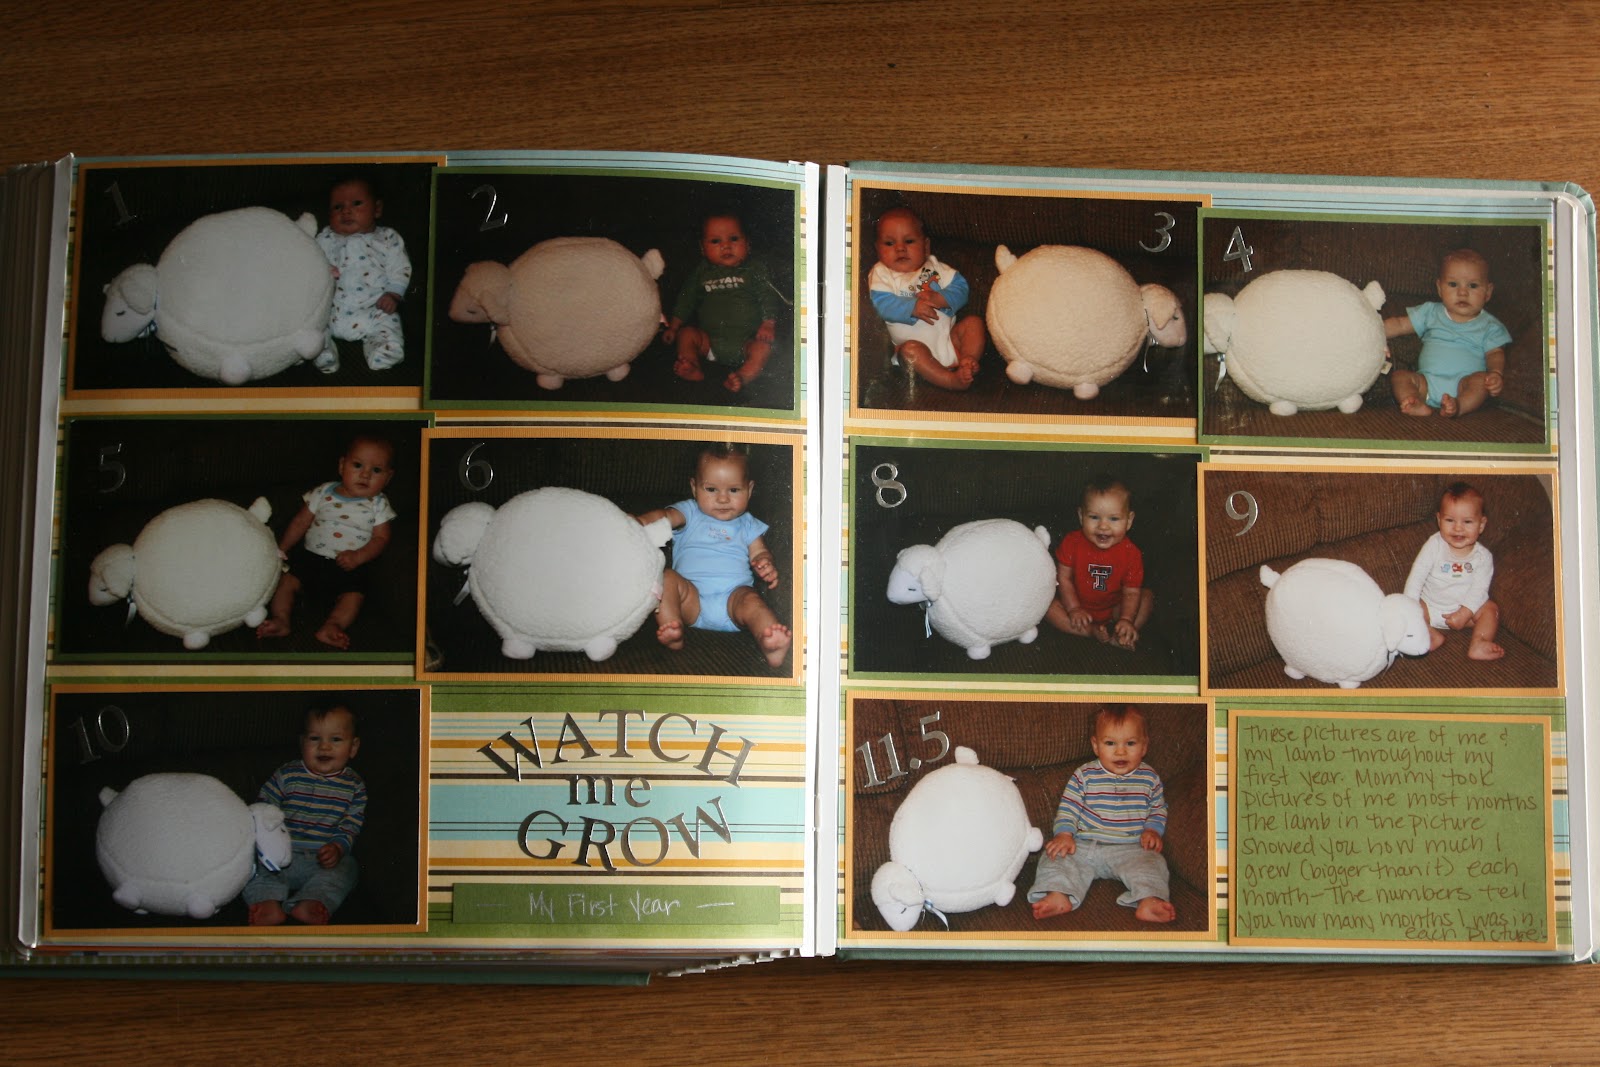
The following layouts are a few of my favorites from my son's First Year Album. They are all simple but very cute. My favorite is the snapshot layout above and the Halloween layout below. Since Halloween is around the corner (I really need to start working on costumes so that it is not a mad dash the week before) I thought that this layout would help some of you in the coming months when it is time to scrap those Halloween photos. Side note: I have already been working on some Halloween projects. I can't wait to share them with you! Anyway, hope you enjoy the layouts! Have a wonderful day and remember it is always homemade!


Followers


Copyright © 2008 Designed by SimplyWP | Made free by Scrapbooking Software | Bloggerized by Ipiet Notez | Blog Templates created by Web Hosting Men