Why, yes, it IS a 4th post for the week! It is a holiday weekend, right? Why not have a little more fun this week and do a random video of my craft area??? Sure, why not? :-) So, after all this time, I have never shown you all my craft space. Please disregard my dirty clothes in the video...oops!
FYI: I do have a little more storage of things in my closet (much to my husband's dismay...)....but we were NOT going there! :-) My sewing machine and sewing "stuff" is in there as well as some things for my scrapbooking that I do not use daily. Anyway....here we go....
To start off this little series on my blog, you get two card ideas and two videos! No, I am not kidding! Kristina Werner did a short series on how she finds inspiration all around her from her surroundings and all different types of scrapbooking items. One of her quick tips during this series was looking at small printed tags and using those as a "sketch" of sorts. So, this month, we are going to focus on that aspect. I bought several 12x12 pieces of paper that had 12-16 tags printed on them (you can see these in the first video below). I have taken that tag this week and made two cards. The first is actually using the tag on a card and the second one is using the tag itself as the sketch. Below are the videos of my making both cards and showing you how this works. I hope you enjoy this series and I hope it gets your juices flowing. I have had a lot of fun making these series of cards. Hope you enjoy and remember it is always homemade!
This is a sign-in sheet I made for a shower last Sunday after church services. This wedding decor is mason jars, candles, and burlap as was the shower decorations. So, I went with the theme and started creating. I did a quick video below to show you how I did the mason jars....SCAL program is awesome! This could be easily made into a scrapbook page for canning or anything "southern". Hope you have a great day and remember, it is always homemade.
Sorry guys, no scrapbook page this week. I have been out of town the last two weeks and leaving again on Tuesday so, to say the least I have been busy! I am working on a layout for a sign up sheet for a wedding shower at church for tomorrow night and I had planned on posting that today, but it may not be finished until tomorrow afternoon....just in time for the shower. It is really cute so far! Anyway, instead of the normal scrapbook page, I did a quick video of things I picked up while out of town this past week. My husband does some contract work with a company in Louisville, KY and we spent the week there with him this past Sunday through Thursday. He worked. The kids and I played. I stopped into the local Archiver's and also went to the local Joann's just because I could! :-)
As I have told you, recently I hosted a Stampin' UP! party as well, so this following video is what I bought from Stampin' UP! with my hostess "money" and what I snagged at the Archiver's and Joann's. Have fun watching and I can't wait to show you how I use some of these products when I get back from being out of town AGAIN! I will be home most of the fall! :-)
Have a great day and remember it is always homemade!
How cute is this card???? And, really, with the video instructions below, it is really a lot easier than you think!! I saw this on Google Images one day and actually made this video when I first started making them for my blog. I just never did post it...so, here it is and hopefully you enjoy the tutorial and have fun making and giving this card to someone! Have a great day and remember, it is always homemade!!!
So, seriously, Stacy Vaughn's tutorial for this coloring case is AWESOME! How do people come up with these things? I would have never thought to do this! After this post on her blog she had two more posts that have more ideas for a DVD case. Here are the two tutorials: coloring case and travel checkers
I saw this idea and made two for my kids and then let them decorate the outside. This case is great for church services, sitting at the doctor's office, car rides and much more! My kids pick out new stickers to stash in theirs every couple of weeks at the Dollar Tree, Walmart or Target. Wherever we may be that week when we see some cheap stickers.
I made this video and it will be featured on another website (along with an introduction added that is not seen here) for the Keeper's At Home website. Before you view this video I just want you to realize what I am refering to on the video when I say a few things refering to the introduction part that you will not see here. Does that make sense? Anyway...here it is and have fun making this case. Believe me, it will be used by any child you decide to make it for! Remember, it is always so much more fun when it is homemade.
I know many out there are looking at this blog and others thinking, "How do these people come up with this stuff? I could never do anything this creative!"....but, I am here to tell you, that YES YOU CAN!! Today's post and video is just for you! If you can glue, tie a bow and use a stamp....YOU CAN DO THIS!! One of these sets came from the dollar area in Target and the other came from the dollar area in Micheal's. For two whole dollars, a stamp and a couple of scrap pieces of paper, you can have a whole set of homemade cards in your pocket! Watch the video and see what you can accomplish in just a few minutes! The final pics are below.
And for those of you who think you are NOT creative, just remember, push yourself a little bit because it is always better when you believe in yourself and actually do something out of your comfort zone! Remember, it is always fun and always homemade!
Okay, so here it is along with a video of how-to. I made a lot of mistakes while making this...primarily in the order I tried to conquer this project...but, I will tell you how you SHOULD do it and then you won't have as much trouble as I did! It took me a few weeks to do this...a little at a time...but it shouldn't take you too long if you do it in the right order! My husband was out of town this past weekend and I worked on this thing diligently when my kids were taking naps as well as late at night each night! I lost sleep over this thing! Doesn't that make it worth something?? ;). I will probably make some changes along the way but I am generally happy with it right now! I hope you enjoy the video and the steps you should take before beginning this project!
Something else I thought about after I made this video is that I think before every trip that we take this journal on, I could cut out some shapes or words that would "go with" the trip and slide them into a pocket so that I would have some diecuts to use if I wanted to.....for example, last year we went to NYC and I could have cut out small images of the statue of liberty, a taxi cab...etc. It would be really cute to have some diecuts with you on the trip to stash into your pages! Just a thought!
Steps On How-to Make This Smash Book More Efficiently:
1. Pick you primary paper that you are going to use and cut into the same size pieces (however large you want them). Mine are all 6x6 squares. The cover pieces are 6 1/4x6 1/4.
2. Make a pile of tags, envelopes, book pages, puzzles, scraps, tickets, etc....that you want to insert into the book pages. AFTER you have pulled all these out, flip through the base pages and insert all your tags and other pieces.
3. Make the amount of dividers that you want in your book....you can make them regular dividers or you can make them with pockets.
4. Ink all the edges that you desire!
5. Put in all your stamps and any embelishments that you want to! Stamps, paper clips, flowers...etc.
6. Punch holes into your covers! DON'T do it after you designed the cover...take it from me, DON'T do this!!!
7. Design your covers!
8. Insert rings!
9. You are done!!
Have a great day and remember it is always homemade!!
I went to Tuesday Morning here in town a couple of weeks ago (Tuesday Morning is a store that sells name brand things at a discount) and found this "circle design" paper in a pack for $1.99. You get 25 sheets of double sided cardstock made by American Crafts for only $1.99!!!! Seriously! It is a huge pack of the same paper but, when you do a lot of crafts it comes in handy when you make double of everything. When I made this set I used this paper as an accent on each card. I also made the two boxes (as seen below) with this cardstock as well so that when I sell it or give it away, it all matches! I made two sets of these cards when I made them because it is always easier to go ahead and make another set at the same time. This paper is so cute and you can do so many things with it and use so many different color combinations.
These are the boxes that I made to put the 2 sets of cards in to give away or sell. The one on the left is the "magazine type" box that I did a video on a couple of weeks ago. The one on the right is a new box that takes minutes to make! You can see directions in the video below...
This is the back of the box on the right in the picture above.
So this video is just an extra little fun for the week...it features a few projects that are in the works and what is coming up next week! Hope you enjoy! If you have any comments, please suggest any ideas you may have!
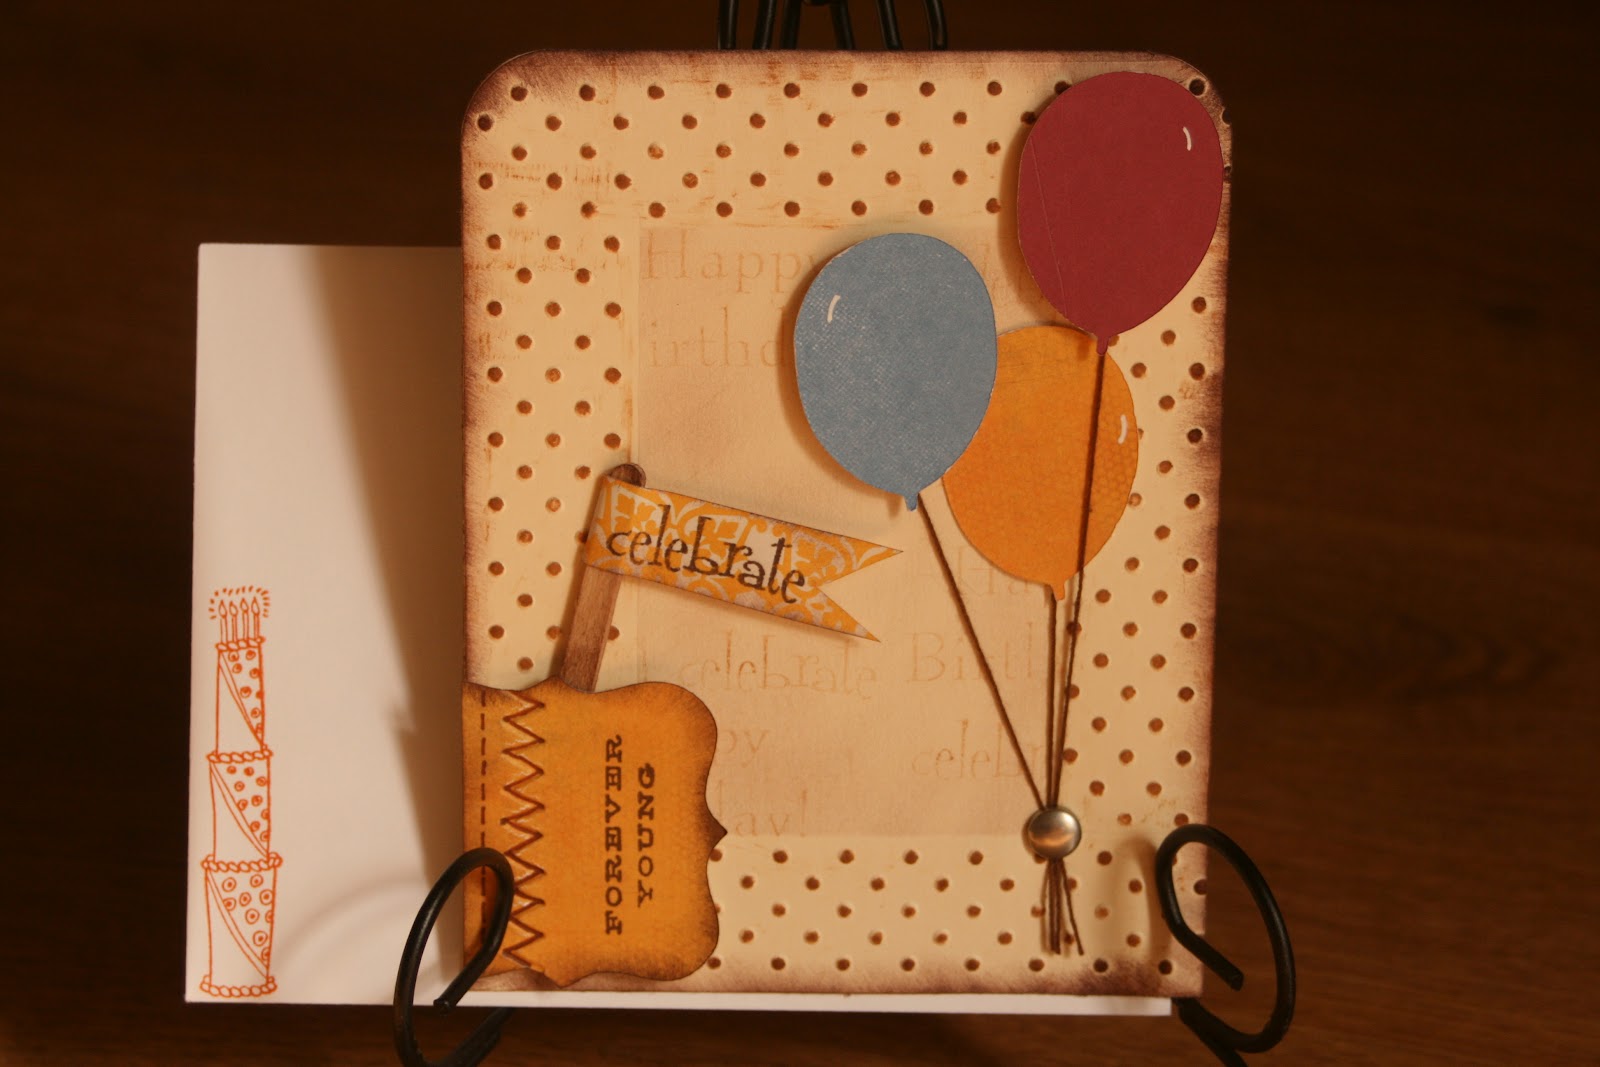
I have made so many different cards, but I have not made many different folded cards....does that make sense? I have never made a stand up card! They always look so cute, but I just have never done it, so here is my first! As you can see, when it is opened the one who receives it can open it up, read it and then display it if they so choose. It was difficult to try and type the instructions on how to do this (believe me, I tried) but I was even confused! :-) So, I did a quick video on the basic fold of this card and also on how to make a 5x5 envelope to put it in. The final size is a 5x5 square card. The sizes for the paper on it are just 1/4 inch less than the squares or rectangles they sit on. So, have fun watching the video and go make a stand up card this afternoon! Another picture from the front is below which is followed by the video!
Hope this helps you create a new stand up card!!! Have a great day and remember it is always homemade!
This turned out so much cuter than I anticipated!!! It looks great finished and put together with the black and white card set that was on the blog last week!!! It is perfect for a gift or to store finished cards. The original idea was on http://www.kardsbykadie.blogspot.com/ in January 2012 and I saw this on http://www.southerninkerbelles.blogspot.com/ during February! I changed the size of theirs so that I could fit A2 size cards in it instead of 3x3 cards. I use and make mostly A2 size cards and I wanted something that would work for me, so, after a few test runs, I got the measurements right and made a 2 part video for you! Enjoy and get started! You WON'T be disappointed with the outcome! The measurements are re-written below the videos.
PART 1
PART 2
Measurements:
12x12 piece of Cardstock
Score at 5 1/4 and at 6 3/4
Turn Clockwise
Score at 1 3/4 and at 6 1/2
Cut as seen in video
Trim a 1/2 inch off of the top flaps and bottom flaps
Trim 1 3/4 of an inch off the middle flaps
Fold as seen in video
Top indention for the slant cut is 3 1/4 from the side
Side indention for the slant cut is 3 3/4 from the top
Glue and fold as directed in the video
Here is the finished project all wrapped up as a gift to someone of your choice!! I mean, wouldn't you get excited if you got this as a gift???? Thanks to Kadie and Beth for the inspiration for this card holder!!
Have a great day and remember it is always homemade!!!
Let me begin by saying...."NO CHUCKLING PLEASE!!!" Hope you enjoy the video and I hope it helps you make this cute owl. I have to say, it is so weird listening to yourself on a video! I sound so strange! :-)
As promised, I actually did a video!!! Wow! I am not going to do these all the time, but I thought for some things, they might be appropriate and a lot of help! So, here goes! This is the Valentine Owl that I made for my daughter to give to her Bible Class Teachers on top of a piece of candy (see my post of 2/14/12). They turned out so cute. Enjoy the video! FYI: I do go off the camera a couple of times to cut with scissors....I will work on that! :-)
Also, I think you could use these for NUMEROUS things...i.e. cards, scrapbook layouts...just change the colors and you would have a whole new look. Have fun and good luck! Remember, it is always homemade!
You should be automatically redirected in 5 seconds. If not, visit
redirectLink" href='http://www.hshomemade.com/'> http://www.hshomemade.com
and update your bookmarks.
I am a Christian Wife and SAHM of two wonderful kids. In my spare time (which there is little of) I create! I make mostly paper crafts but I also sew some as well. I will try anything once! If you see anything that you would like to purchase on my blog, please feel free to email me at homemade.hs@gmail.com