Friday, June 29, 2012

Envelope Album


LAST DAY TO ENTER THE GIVEAWAY THIS WEEK!!!  I KNOW THERE ARE 100+ HITS A DAY ON THE BLOG....YOU HAVE TO COMMENT TO WIN!!!  HERE IS THE LINK:

This is a type of album I have wanted to make since I made my Travel Smash Book/Junk Journal.  You can view this project HERE.  I actually used the same paper pack that I used on the Travel Book.  I really like it because it is very "antiquey" (I know I just made up a word) and also a very vintage feel.  I LOVE it!  So, I used it once again on this album.  I am going to use this album for pictures of my grandparents and my husband's grandparents and also our parent's pictures.  I have a few 4 generation pictures on my side of the family as well.  I think it will be a good little history album for my kids one day.  With the envelopes, I can also add memorabilla from their lives that will be neat for my kids to have someday.  Anyway...instead of taking lots of pictures of this album, I chose to make a quick video.  Enjoy and remember it is always homemade!  The sizes of the paper are below the video link.


Here are the sizes of my paper that I cut for each envelope face and also the flap.

Face:  5 1/2 x 4 1/4
Flap:  2 5/16 x 5 3/4

Wednesday, June 27, 2012

More Bookmarks = More Reading in the Future!


FYI: To enter this week's GIVEAWAY, go HERE! Here are a few more cute, EASY bookmarks!  Hope you enjoy!  These are mindless crafts!  ANYONE, I repeat, ANYONE can do this!  :-)

The first one is simply a paperclip with a knotted ribbon around the top of it!  Seriously, it takes about 30 seconds and it is so cute!  Many of the craft stores around town are selling these for ridiculous prices and I assume people are buying them because they are still on the racks....but, sorry, if you are purchasing these, you have to be crazy!  Go to Walmart, buy some large paperclips and some ribbon and you can make as many as you want for SOOOOO much cheaper!  That is my 2 cents!  :-)

The second one is obvious as to what it is.  It is a paint chip card with a hole in the top with a ribbon knotted through the punched hole.  I let my kids do some finger painting on a couple for my Mom and my Mother-In-Law a couple of months ago.  We sent them in the mail and they were thrilled to get this personal gift from the kids!  Super simple and a fun craft for the kids.  I plan to let the kids do some fingerprints on these as well the next chance I get.

The third bookmark is a little more complicated but still simple if you have punches or a dicut machine.  This bookmark tutorial is HERE.  You dicut the shape on white (or whatever color you choose) and then place a patterned piece behind the negative of the dicut.  Does that make sense?  Hopefully!  I inked the edges and chose not to stamp or write any words but you could make it however you wanted to...that is what is great about these bookmarks!

Happy crafting and happy reading!  Have a great day and remember it is always homemade.

Monday, June 25, 2012

Paint Chip Card


FYI: To enter the GIVEAWAY this week, go HERE! As promised, here is a project using a paint chip card out of the small pile I scored at Lowe's.  There is another card coming up in the next few weeks using another paint chip as well....FYI!  :-)  Anyway....this card is pretty self explanatory....I folded the card down a little bit, stamped the words and outlined the edges with a white gel pen.  Easy and quick, but always homemade!  :-)

Saturday, June 23, 2012

Stampin' UP! Party and Goodies!


First of all, if you want to be in the drawing for my GIVEAWAY this week, go HERE and just leave a comment and you will be entered into the drawing NEXT Friday! (If this link doesn't work, just scroll down to the last post)

Last night, I asked Beth to come to the house and do a Stampin' UP! Party for me and several of my friends! It was a blast and everyone had lots of fun! We ate, crafted, and just got to know each other better. How much more fun could you get?? We made two cards and one envelope which are seen below. How cute are these?


As Hostess, I got one of every card that was made by Beth as she demonstrated the products. This is the extra card that she made last night (seen below) I also lucked up and received the basket (seen below) made from their new fabric line. Soooooooo cute! I was super excited! Their fabric is soooo cute and trendy!


I did "decorate" just a little bit and I also gave out a thank you gift to everyone who came and spent time out of their lives to come and see all the great Stampin' UP! products. The pics are below. So easy and fun. Directions for the water bottles will be featured on the blog sometime in July. Sorry, you have to wait till then! ;). Have a great day and remember, it is always homemade!


P.S.: Beth has a blog and is listed in my blog list on the right side of my blog page. It is Southern Inkerbelles! She has some great ideas and fun projects all the time! Enjoy!

Thursday, June 21, 2012

2500 Hits on the Blog.....and GIVEAWAY!!!!


So, I know that 2500 hits is not that many, but it is much more than I expected when I started this blog!  I know that most of the people that follow this blog are my friends and family, but many of you aren't in either of those catagories.  Some of my things have been pinned on Pinterest which I never would have guessed!  Like I said when I started this blog, it was to keep me active in my scrapbooking.  I was totally behind (still am) but I am moving closer each week to my goal of being caught up!  :0)  Anyway....back to the matter at hand!  There have been 2500 hits on the blog and I am ready to celebrate.  So, in honor of all of you who watch the blog, I bought a few packs of goodies that you get to have the chance to win.  All you have to do is leave a comment below and at the end of the week (NEXT Friday, June 29th at 12:00am) the contest will end and I will use Random.org to determine the winner!  Just take a minute and comment about why you like the blog (MAKE SURE YOU LEAVE AN EMAIL ADDRESS TO GET IN CONTACT WITH YOU) and you get a chance to win.  The winner will be announced shortly after the deadline!  Good Luck.  The following pictures are the loot the winner will receive! Also, there may be a few homemade goodies in the prize as well! :)


Wednesday, June 20, 2012

Corner Bookmarks


Those of you who know me, I read A LOT.  I am one of those annoying people who can't stand to fold a page corner down in a book and for that reason, I have been known to make many bookmarks because they somehow get lost along the way!  I have a few right now that I actually haven't lost!  I found this fun website just recently that had several different bookmark ideas!  I think it was a list of 18 different ways to make homemade bookmarks!  So, I now have a little box full of several very cute bookmarks.  I plan not to loose them this time!  :-)  This week and next week (and maybe again in the future) there will be another post with more ideas for cute homemade bookmarks. 

The first bookmark above, I have been wanting to make for a long time.  It is simply a corner cut off of an envelope (at the size you prefer; mine is a 2.5 inch square cut in half) and then I added the green printed paper to cover the white envelope corner.  You would never guess that is what it was, would you?  I then dicut the ladybug and added it to the top of the bookmark.  I am so excited to start my new book and use this bookmark! 

The second bookmark, I found online.  It is a piece of paper that is folded into this triangle pocket.  The tutorial is HERE.  This is a really cute bookmark...simple, yet cute...BUT it is a little bulky.  Now I used a thicker cardstock, so if you were to use a thinner piece of paper, I think it would be perfect.

The third bookmark is a little different take on the corner bookmark.  Now, on the tutorial that I viewed that you can see HERE, she sewed a stitch around the edge to close it.  I just used glue on the top seal because I didn't feel like getting my sewing machine out.  Yes, I blame it on laziness!  :)  Even without the stitch it is still really cute! 

So, have fun making these for yourself (because you are like me and constantly loose bookmarks), or make them for someone who reads a lot as well!  I am sure they will treasure it because, remember, it is always sweeter and more thoughtful when it is homemade! 


Monday, June 18, 2012

Happy Father's Day


These are the cards that my kids made for my husband for Father's Day!  How cute are these???  I have seen many of these "shirt and tie" cards and one day the kids and I sat down to make them.  It was a work in progress because I wasn't sure how to do the collar.  Next time, we will do it a little different!  :)  I will tell you the right way to accomplish this!  :)

The square part of the card is 5x5....which is a 5x10 piece of paper folded in half.  The collar needs to be a piece of paper that measures about 1 1/2 inch by 7 inches.  You then fold it as shown.  It may take a minute or so to get it right.  I suggest trying it on a scrap piece first!  :-)  The tie is free-handed even though I could have cut one on the Cricut.  I drew the outline and my son (the yellow card) cut the tie out himself which makes it more personal anyway!  My daughter's (the green card) collar is not quite center but I let her put it where SHE wanted it!  :-)  You just glue to two bottom triangles of the collar to the front of the card and pronto...it is done!  The kids had a blast working on these and Daddy was proud of them! 

Remember, it may be off center or crooked but it is always more sentimental when it is homemade!

Friday, June 15, 2012

NYC Skyline


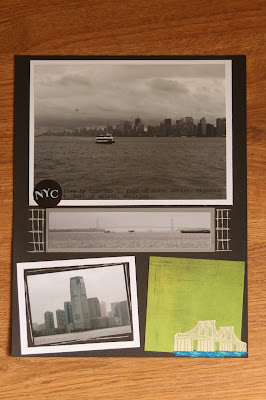
These pictures were taken on the way to Liberty Island. They are not taken in black and white, it was just really rainey and cloudy the entire trip. Next week will be a page done for the NYC album that is a pic of the only blue sky we saw. These pictures actually turned out better than I thought, despite the weather. This was a really quick and simple page to complete. I have said this before but on an 8 1/2 x 11 page layout, there just isn't much room to work with. I chose this size for this album for this trip just because I didn't think I would need a 12x12 but sometimes it would be nice! The color of the journal box and the stickers add a little color to these black and white pics. Have a great weekend! Remember, it is always homemade!

Wednesday, June 13, 2012

Soccer Treats


These are the treat bags that I made for our soccer team at the end of the year party.  My husband was the coach and we had a little celebration as a team last week.  My husband had purchased a trophy for each child and I made some goodie bags for them as well.  I bought a few packs of various candy/snacks and placed them in a clear treat bag and topped them off with these cute little soccer tags.  The craft paper base is 4 1/4 x 5 1/2, folded in half and stapled to the top of the bag.  The green piece (in honor of us being the "green team") is 5 1/2 x 1 1/2 and is adhered with double-sided adhesive.  This adds color as well as doing a great job of covering the staples!  :-)  The soccer ball was cut out using my SCAL software, but I know that Cricut makes several sport cartridges that have soccer balls on them.  They turned out really cute and seriously took no time at all!  Can't you tell that I do anything that takes little to no time???  :-)

Have a great day and remember, it is always fast and always homemade!

Monday, June 11, 2012

Baby Girl Onesie Card


How cute is this card????  And, really, with the video instructions below, it is really a lot easier than you think!!  I saw this on Google Images one day and actually made this video when I first started making them for my blog.  I just never did post it...so, here it is and hopefully you enjoy the tutorial and have fun making and giving this card to someone!  Have a great day and remember, it is always homemade!!!

Saturday, June 9, 2012

Quack, Quack


Okay, I know this is not a true Scrapbook Layout but this is the layout for this week!  :0)  There is a girl at church who is pregnant with her first child and her shower is next Sunday night.  I volunteered to make the sign-in sheet for the shower and voila, here it is!  The theme is obviously rubber ducks!  So cute.  So, I have been thinking about this page all week and finally put it together last night.  It turned out so well, I think!  The vellum bubbles added so much to the layout!  They look great with the royal blue bubbles as well as the yellow "rubber" ducks!  The ducks were cut from the New Arrival Cricut Cartridge at 1 3/4 inches and the bubbles at the top of the page were cut from the Everyday Paper Doll Cartridge at 9 inches.  The bubbles in the bath tub are just circles in two different sizes.  You could punch them out with punches or use a dicut machine.  This is obviously made for a sign-in sheet for a shower instead of a scrapbook page, but you could just add pictures and it becomes a very cute page in a baby book! 


I was also asked to make a couple invitations for her Mom and her Mother-in-law and a couple other family members that she wanted to invite to the shower that do not attend our congregation. So, I used the New Arrival Cricut Cartridge to make these adorable little ducks and then added the ribbon, stamps, and lining around the side.  I stamped "She's Expecting" on the outside of the envelope. I don't have many baby-ish stamps (maybe that should be my next purchase) so I went with the "She's Expecting" stamp instead of a figure stamp.  These ducks are cut at 5 inches and fit perfectly into an A2 size envelope! 


So, today you got 3 in 1!  A sign-in sheet, a possible scrapbook layout, and an invitation idea (which could also be a cute card for a baby shower).  You lucked up!  :-)  I hope everyone has a fun day of crafting and a great weekend spent with those you love!  Remember, it is always homemade!

Wednesday, June 6, 2012

DVD Repurpose....Pinterest Idea


So, seriously, Stacy Vaughn's tutorial for this coloring case is AWESOME!  How do people come up with these things?  I would have never thought to do this!  After this post on her blog she had two more posts that have more ideas for a DVD case.  Here are the two tutorials:  coloring case and travel checkers

I saw this idea and made two for my kids and then let them decorate the outside.  This case is great for church services, sitting at the doctor's office, car rides and much more!  My kids pick out new stickers to stash in theirs every couple of weeks at the Dollar Tree, Walmart or Target.  Wherever we may be that week when we see some cheap stickers. 

I made this video and it will be featured on another website (along with an introduction added that is not seen here) for the Keeper's At Home website.  Before you view this video I just want you to realize what I am refering to on the video when I say a few things refering to the introduction part that you will not see here.  Does that make sense?  Anyway...here it is and have fun making this case.  Believe me, it will be used by any child you decide to make it for!  Remember, it is always so much more fun when it is homemade.

Tuesday, June 5, 2012

Great To Be Back....


Yesterday, I got to make a few things at my craft desk for the first time in what seems like years! We were at my parent's home in Florida for a week, came home for three days and then left again for South Carolina for the high school graduation of my niece. So, to say the least, there has been no time for crafting. If you think that was a couple of whirlwind trips, the month of July for us is going to be even more crazy! It would be easier to tell you what days we will be home, than to list the days we will be out of town. July is always busy for us, which means that my "craft world" in the month of June is going to be crazy, getting ready for next month's posts! We are only a few hits from a total of 2000 hits since I started my blog back in December! I know that isn't many in the grand scheme of things but each day is getting more hits than the last! I am really excited about that! When I started this blog, I just didn't know how successful it would be but I have had more people say they like to follow the blog than I thought I would. When you take something on like this, you want it to be a success, and you hope it will be just that! I really appreciate all of you who follow the blog and possibly next week, there will be a give away for the lucky reader who posts a comment to an upcoming post! Keep an eye out for that and remember, it is always homemade!

Monday, June 4, 2012

Friend...


Back in January I had a post (that you can see HERE) about the $1 packs of paper that you can buy at Joann's.  This is another card made from one of those packs.  Very simple and quick since you already have all the coordinating paper at your fingertips!  Just a quick and cheap way to make a few cards very quickly!  I added the ribbon and the snaps at the top (and obviously the stamp) and voila....it is done and so cute!

This would also be a cute card to do by just pulling out your scraps!  Another way to get rid of that pile!  Because, I know all of us have a pile of leftovers! 

Step out of the box and remember, it is always homemade!

Friday, June 1, 2012

Tuesday Morning Goodies


\

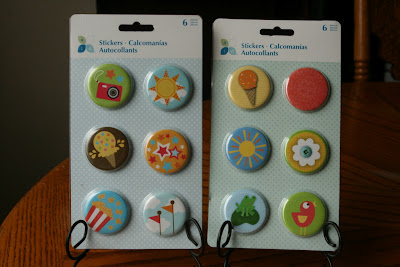
Remember, still out of town, so here are some stamps that I happened upon at the Tuesday Morning around the corner from our subdivision.  Love having this great store so close!  I got these 3 stamp sets for only $1.99 a piece!  I really can't wait to use them becaue I have already thought up several ways to put them to use in several projects.  I also snagged these really cute chipboard flowers.  They are soooo cute and will look great on cards or scrapbook pages in the future.  When I get back in town, these will definiatly be put to use!  If you have a Tuesday Morning near you, go check them every couple of weeks...you never know what they might have on the shelves!  And, each one is different!  I know the one around the corner from my house has Tim Holtz products right now for WAY cheaper than they run in a regular craft store!  Just sayin'! 

Have a great day and remember, it is always homemade!

Followers


Copyright © 2008 Designed by SimplyWP | Made free by Scrapbooking Software | Bloggerized by Ipiet Notez | Blog Templates created by Web Hosting Men